
Installing your own SRM server
From an empty Debian machine to the first paired customer system – step by step. After installation the SRM server runs in trial mode for 14 days, so you only need a licence after that.
Downloads
SHA-256 of the installation package: ca106a123b3faebe4823e82b174cc6d540f131b575654ddff82f4a122b36f796
You download the app for the innovaphone App Platform later, directly in the SRM client (step 6).
What you need
- A machine with Debian 13 (64 bit, amd64) – as a VM on Proxmox, VMware, Hyper-V etc. or on bare metal. Recommended: 2 CPUs, 2 GB RAM, 10 GB disk, a fixed IP address in the LAN.
- Internet access for the machine (the installation downloads some Debian packages).
- A DNS name (e.g.
srm.your-company.com) pointing to your public IP, and a port forwarding of TCP 443 to the SRM server – so the customer systems can reach it from the internet. - A Windows PC for the SRM client.
- At the customer's: an innovaphone App Platform (firmware 13r2 to 16r1) and administrator access to the PBX.
- An authenticator app on your smartphone (e.g. Microsoft or Google Authenticator) for two-factor login.
1Provide Debian 13
Install a minimal Debian 13 (netinst image from debian.org). In the software selection, “SSH server” and “standard system utilities” are enough – no desktop environment. Assign a fixed IP address (during installation or via a DHCP reservation in your router).
It does not matter whether the machine is a VM or real hardware. The installation sets up the matching hypervisor guest tools itself.
2Install the SRM server
Log in as root via SSH (or on the console) and enter:
cd /root
wget -O srm-server.tar.gz https://srm.tm-nettech.de/download/srm-server
tar xzf srm-server.tar.gz
cd srm-server-*/
bash srm-install.sh
Alternatively, copy the package from the downloads above to /root, e.g. with WinSCP, and start at tar xzf ….
The script does everything else:
- installs the required packages (including Caddy for the built-in proxy with a Let's Encrypt certificate),
- creates the service
srmserver(usersrm, folder/opt/srm) and starts it, - sets up the firewall – open are SSH (22), 443 and the SRM ports 7778 and 7779,
- switches on automatic Debian security updates.
At the end it shows the address, the fingerprint and the setup code for the first
account. The command srm-info shows this information at any time.
Options: --keine-firewall (your own firewall rules), --keine-autoupdates.
3Set up the SRM client
Unpack the SRM client (download above) into a folder of its own on your Windows PC and start
srmclient.exe. As server, enter ws://<IP-of-the-SRM-server>:7779 in the LAN for now.
- Compare the fingerprint. On the first connection the client shows the server's fingerprint.
It must match the one shown by
srm-info.
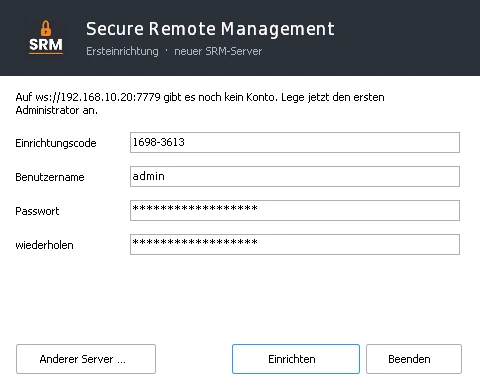
- Create the first administrator. Enter the setup code, choose a user name and a password (at least 8 characters).
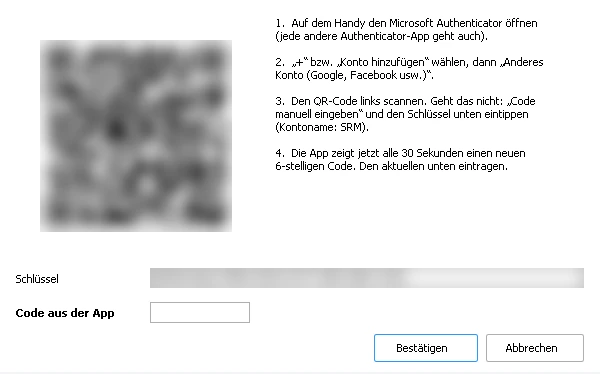
- Set up the second factor. Scan the QR code with your authenticator app and enter the 6-digit code it shows.
From now on every login asks for it.
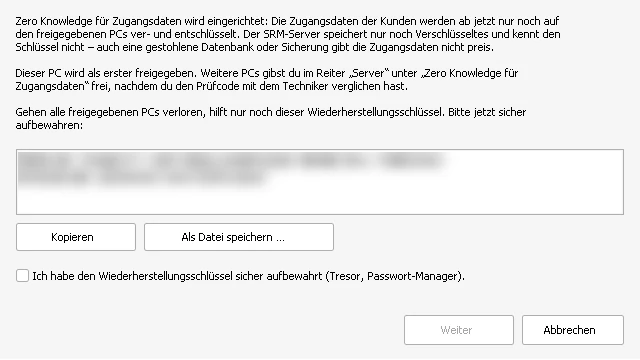
- Keep the recovery key safe. Thanks to Zero Knowledge, your customers' credentials are only decrypted on
approved PCs. Store the recovery key shown here in a safe place (safe, password manager) – without it the credentials are
lost if all approved PCs fail.
The screenshots show the German interface; the SRM client can be switched to English in the “Server” tab under “Language”.
4Start trial mode or install a licence
Without a licence, access to customers is blocked. In the “Server” tab, “Licence …” opens this dialog:
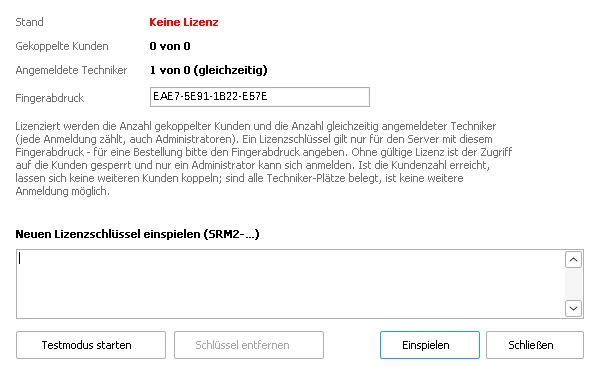
- Start trial mode: 14 days, up to 10 customers and 3 technicians logged in at the same time – once per server.
- Buy a licence: choose the right plan on the pricing page. When ordering, enter the
fingerprint shown here (you can also submit it later). You receive the licence key (starting with
SRM2-) by e-mail, paste it into this dialog and click “Install”.
When the trial mode ends, all customers and settings are kept; as soon as the licence is installed, everything is available again. The licence is bound to this server (fingerprint) and moves with the backup to a new server.
5Make it reachable from the internet
- DNS: create an A record with your DNS provider, e.g.
srm.your-company.com→ your public IP address. - Router/firewall: forward TCP 443 to the SRM server. Port 80 is not needed.
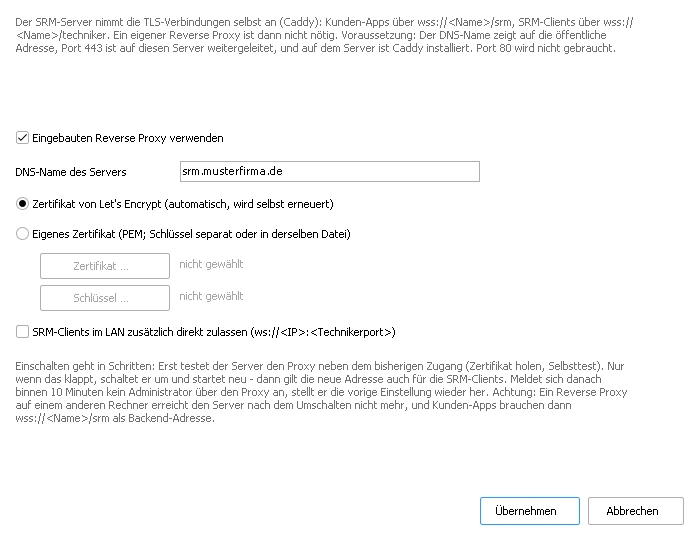
- Switch on the built-in proxy: “Server” tab → “Reverse proxy” → “Proxy …”. Tick the box,
enter the DNS name, choose “Certificate from Let's Encrypt” and “Apply”. The server obtains the certificate itself,
tests the new access and only then switches over.
After that these addresses apply:
| Who | Address |
|---|---|
| Customer apps (backend address) | wss://srm.your-company.com/srm |
| Technicians' SRM clients | wss://srm.your-company.com/techniker (switches over by itself at the next login) |
Your own certificate instead of Let's Encrypt: choose “Own certificate” in the same dialog. Already have your own
reverse proxy? Then leave the built-in one off and forward /srm to port 7778 and /techniker to port 7779
of the SRM server.
6Install the app at the customer's
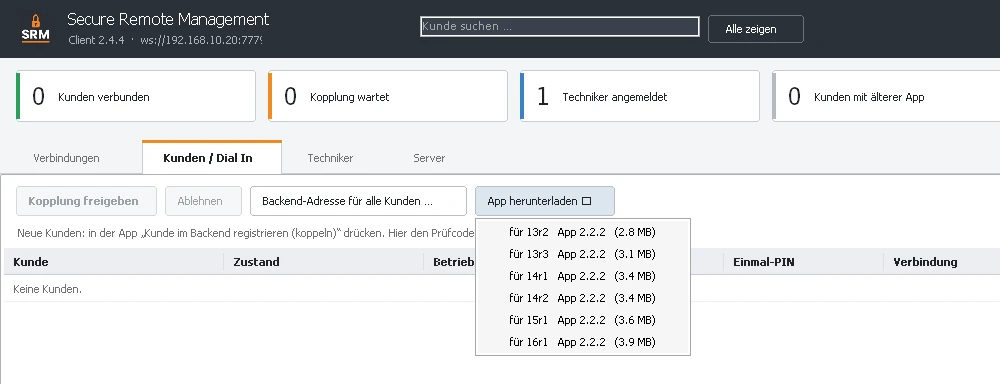
In the SRM client, tab “Customers / Dial In” → “Download app”, choose the package for the firmware
version of the customer's App Platform (13r2 … 16r1). The ZIP contains a folder each for arm, arm64 and
x86_64 – the AP Manager shows which platform the App Platform has.
- AP Manager (developer mode): upload
srm-remote,srm-remote.pngandhttpfiles.zipfrom the matching folder. - Create an instance: name
srm-remote, domain = system name of the PBX, set an instance password and a database password, start the instance. - App object in the PBX: name
srm, password = instance password, URLhttps://<AP>/<domain>/srm/srm. Tick Websocket, PBXSignal and Services and, in the “Apps” tab, tick the AP Managerapps(PBXSignal is needed for Dial In, Services + apps for app updates via the SRM server). With master/slave, enter the master PBX permanently in the app object. - Optional for Dial In: create a user with a phone number and hardware ID; enter the same hardware ID in the app.
- Assign and open the app: assign the app to a user and open it in myApps.
6bWithout App Platform: Devices registration
If the customer only has an innovaphone PBX or gateway without an App Platform (e.g. IP411, firmware 13r1 or later), the PBX connects to the SRM server itself – without any app:
- In the PBX web interface (Advanced UI), under General → Devices Registration, enter the backend URL
wss://srm.your-company.com/srmas the address – the same one as for the apps. - Do not tick “TLS/SSL certificate checking” there – with this box ticked no connection is established.
- In the SRM client the PBX appears in the “Customers / Dial In” tab as waiting (with its serial number). After “Approve pairing” it is a customer with the operating mode “web interface only”.
This way only the PBX's web interface is reachable – no further targets, no Dial In, no app settings. It requires
access via wss:// with a valid certificate (step 5). No password is sent to the PBX and nothing in its configuration is
changed. The PBX counts as one customer for the licence.
7Pair customers and get started
- In the app, enter the backend address (
wss://srm.your-company.com/srm), the customer name and the targets (one line per device, e.g.PBX = 192.168.0.2:443), click “Apply” and then “Register customer in backend (pair)”. The app shows a check code.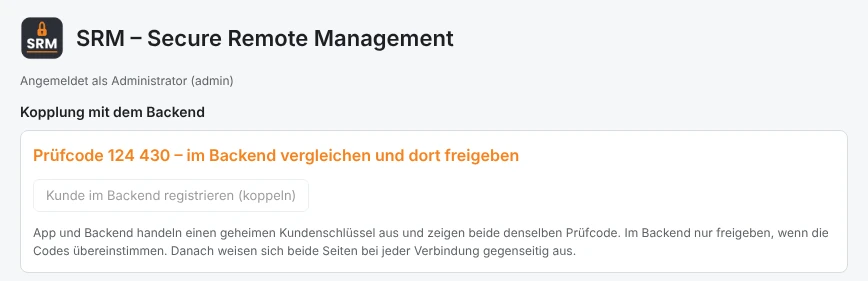
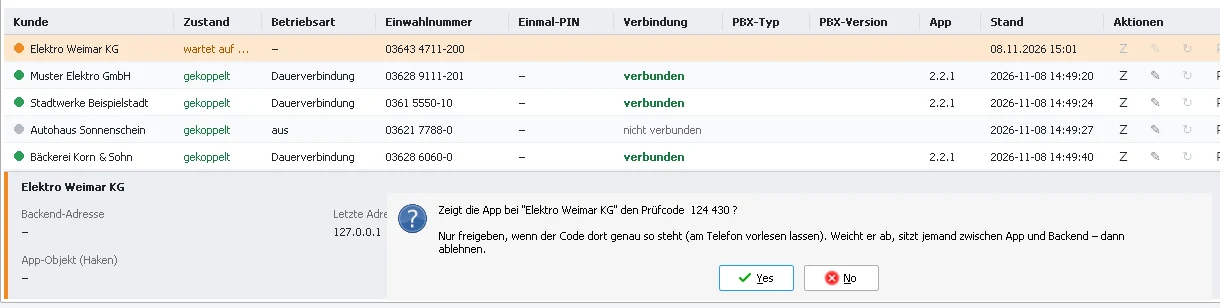
- In the SRM client the customer appears under “Pairing waiting”. Compare the check code (ideally read it out on the
phone) and click “Approve pairing”.
- Choose the operating mode (in the app or via the pencil icon in the SRM client): permanent connection or Dial In activation (connection only after a call with a one-time PIN).
- Maintain remotely: in the “Connections” tab, select the customer and click “Open in browser”.
You create further technicians in the “Technician” tab. The “Client package (ZIP)” icon creates a fully configured SRM client for each technician – all they have to enter is their password.
Updates
You install a new package with the same commands as in step 2. Database, keys, licence, settings and logs are kept; if the new server does not start, the script automatically brings back the previous one. New app versions are then rolled out in the SRM client with “Update app” – without visiting the customer.
Backup
- SRM backup: “Server” tab → “Backup” → “Export …” – customers, keys, accounts, policy and licence in one file, encrypted with a password of its own. You also use it to move to a new server.
- Backup of the whole VM: the file
/opt/srm/srmserver.secretkeymust be included, otherwise the server will not start from the backup. - Keep the recovery key for Zero Knowledge (step 3) safe and separate from it.
Useful commands on the server
| Command | Effect |
|---|---|
srm-info | state, version, address, fingerprint, setup code |
systemctl restart srmserver | restart the server |
less /opt/srm/srmserver.log | log (rotated daily, kept for 60 days) |
/opt/srm/srmserver reset2fa <name> | emergency: reset an account's second factor (e.g. smartphone lost) |
runuser -u srm -- /opt/srm/srmserver proxy offand systemctl restart srmserver | emergency, if the built-in proxy can no longer be reached |
Questions?
Write to us at srm@tm-nettech.de. Would you rather try it first without installing anything? Then request a free demo server.